Saturday, February 16, 2013

Quilt finished. What's next?

I]]]Somewhere angels are singing the Hallelujah Chorus--The Zebra Quilt is Done and Delivered!!!!! Terri loved it. The people at work applauded appropriately. Now we are on to the next project. But first, I want to show me and the quilt:

Do I look happy, or what? Now, I'm off to the next project.

Some time past, I got sucked into Annie's Catalog. Annie's sells craft items and kits for quilting, knitting, etc. I'll tell you, if you are ever feeling lonely, join their newsletter by email. I get at least one every day. Anyway, I was offered the opportunity to receive their knitting magazine, Creative Knitting. I really like it. The patterns are current, nice colors (usually), and the directions aren't difficult to follow. The first month I received, there's a sweater on the front that I still have yet to start. This month, the cover is a light aqua shrug. I decided to make it for someone for Mother's Day.
 
The yarn is a cotton blend in light pink/lilac. Very pretty. Very feminine. I think it will be well received.


Can't decide what I'll sew next. I have an order for 2 wine bags--the cotton duck is washing even as we speak. I, also, need desperately need to sew work uniforms. I really don't look forward to fine tuning scrub pants, but that is something I seriously need. The ones I have now are getting thread bare.

The grandson is growing like a weed. Some fun baby clothes would be awesome, especially with the new embroidery machine. Face it, I need a month off from work to sew. Perhaps scheduling a sewcation is in order. Hmmmmm. It could be arranged. . . . .


Sunday, February 10, 2013

Zebra print and bows. A winning combination.

I am almost finished with the zebra quilt. It has taken me about 10 hours to do all the quilting, even with the sewing machine. I think it is beautiful, though. Yesterday, I cut a template out of thick plastic for the bows. I wanted the quilt to have interest on the border--an unexpected surprise from the quilter. I hand drew bows and printed out various sizes on the Xerox machine. Then, I cut out my paper pattern and positioned each size on the border. The medium sized one fit perfectly. I traced the pattern onto my plastic template material, and carefully cut it out. Then, I positioned the template onto the quilt border and traced around it lightly with a number 2 mechanical pencil.

Once traced, the question became:  how do I do the quilting. I wanted the bows to POP against the plain, pink border, so black thread seemed the best option. However, machine quilting would not yield the handwork quality that I wanted, so I opted to hand quilt each bow. Here's my final result:

Is that not absolutely gorgeous?!! I love it!! It took me about 20 minutes per bow, which is not a lot of time. I placed one bow at each corner and at the midpoint of each panel.

Now, the question is what to do with the spaces in between the bows. I am thinking adding ribbon shaped quilting, too, but have yet to find the perfect ribbon template. I've tried drawing one, but it's too one-dimensional. I'll get online and see if there is another template or design that I can modify to fit my need.

Sunday, February 3, 2013

AAAAArrrrrgh!!!

So, I am quilting along today, and what do you think happened? The old, reliable Bernina 1230 died. At least I think it's dead. I had been sewing all morning and turned the machine off. When I turned it back on, the lights on the stitch selection thingy started flashing and the needle kept jumping from the middle to the left side. It wasn't pretty. Thank God, I have the new Janome. I closed up the old one, opened the new one, spent an hour familiarizing myself with the fancy touch screen, and off I went. So far, the quilt is 1/2 done. By quilting the zebra print, the pattern has interest and texture:

See how it ripples? Cool, huh? 


Here's another view. I love it!!


And the back is even better:
The textural interest is great.

I have to give quilting a rest for awhile, though. I'm rather pooped after the sewing machine ordeal. I may sit and veg out, watching Super Bowl, pre-game hype and knitting. The Pottery Barn knock-off afghan is coming along beautifully.

I hope to get it done and shipped for my daughter's birthday, February 9, but that may not happen. I need to add at least 6 more inches to fit my son-in-law's tall frame. He requested that it cover him, too. Since she is 4'11" and he is 6'2", I opted to knit to fit him. Anything fits her.


Saturday, February 2, 2013

Well, it's been over two months since I blogged. Yes, the baby was born January 1, 2013. Asa is perfect, and my daughter, though totally worn out in the new mom experience, loves being a mom and is doing very well. Since Asa's arrival, my sewing has slowed down horribly. Now that we are getting used to him, I am trying to get back to normal, which means I sew whenever I can grab a free moment.

Currently, I am quilting a daybed cover for a lady at work. The backing is black minky and the front is a zebra rectangle framed with pink cotton. I sewed it together, then decided the pink didn't "pop" so I ripped it out and added a strip of the minky around the edges. I love it!! Here's a picture after I attached the minky binding:

This is a view from the wrong side as I was stretching out the quilt before spray basting the batting in place. I think being non-educated regarding "proper quilting techniques" allows me to work with what I got, including my brain. I was sewing alone and had no one to help stretch the quilt, so I pinned it to the bed. If you look close, you can see the ridges in the bedspread where the pins were pushed into the mattress pillow top.

Next, I spray basted the batting into place. I used a baby quilt sized batting and since the minky is polyester, I used polyester, medium loft batting.


Then, I sewed around 3 of the 4 sides and turned the quilt. I was surprised since I have never used spray basting before how well it stuck.I pinned the quilt layers together in preparation for the actual quilting process. I had 2 packages of quilting safety pins. I think there are 70 pins per package. Those covered about 1/4 of the pins. I bought 150 more, but that still wasn't enough. After a third trip to the store, purchasing another 70 pins, I came up about 3 pins short. However, The quilt was secure enough to begin stitching.Thank goodness I had purchased a walking foot several months earlier when I wasn't sure if I would ever consider quilting seriously.

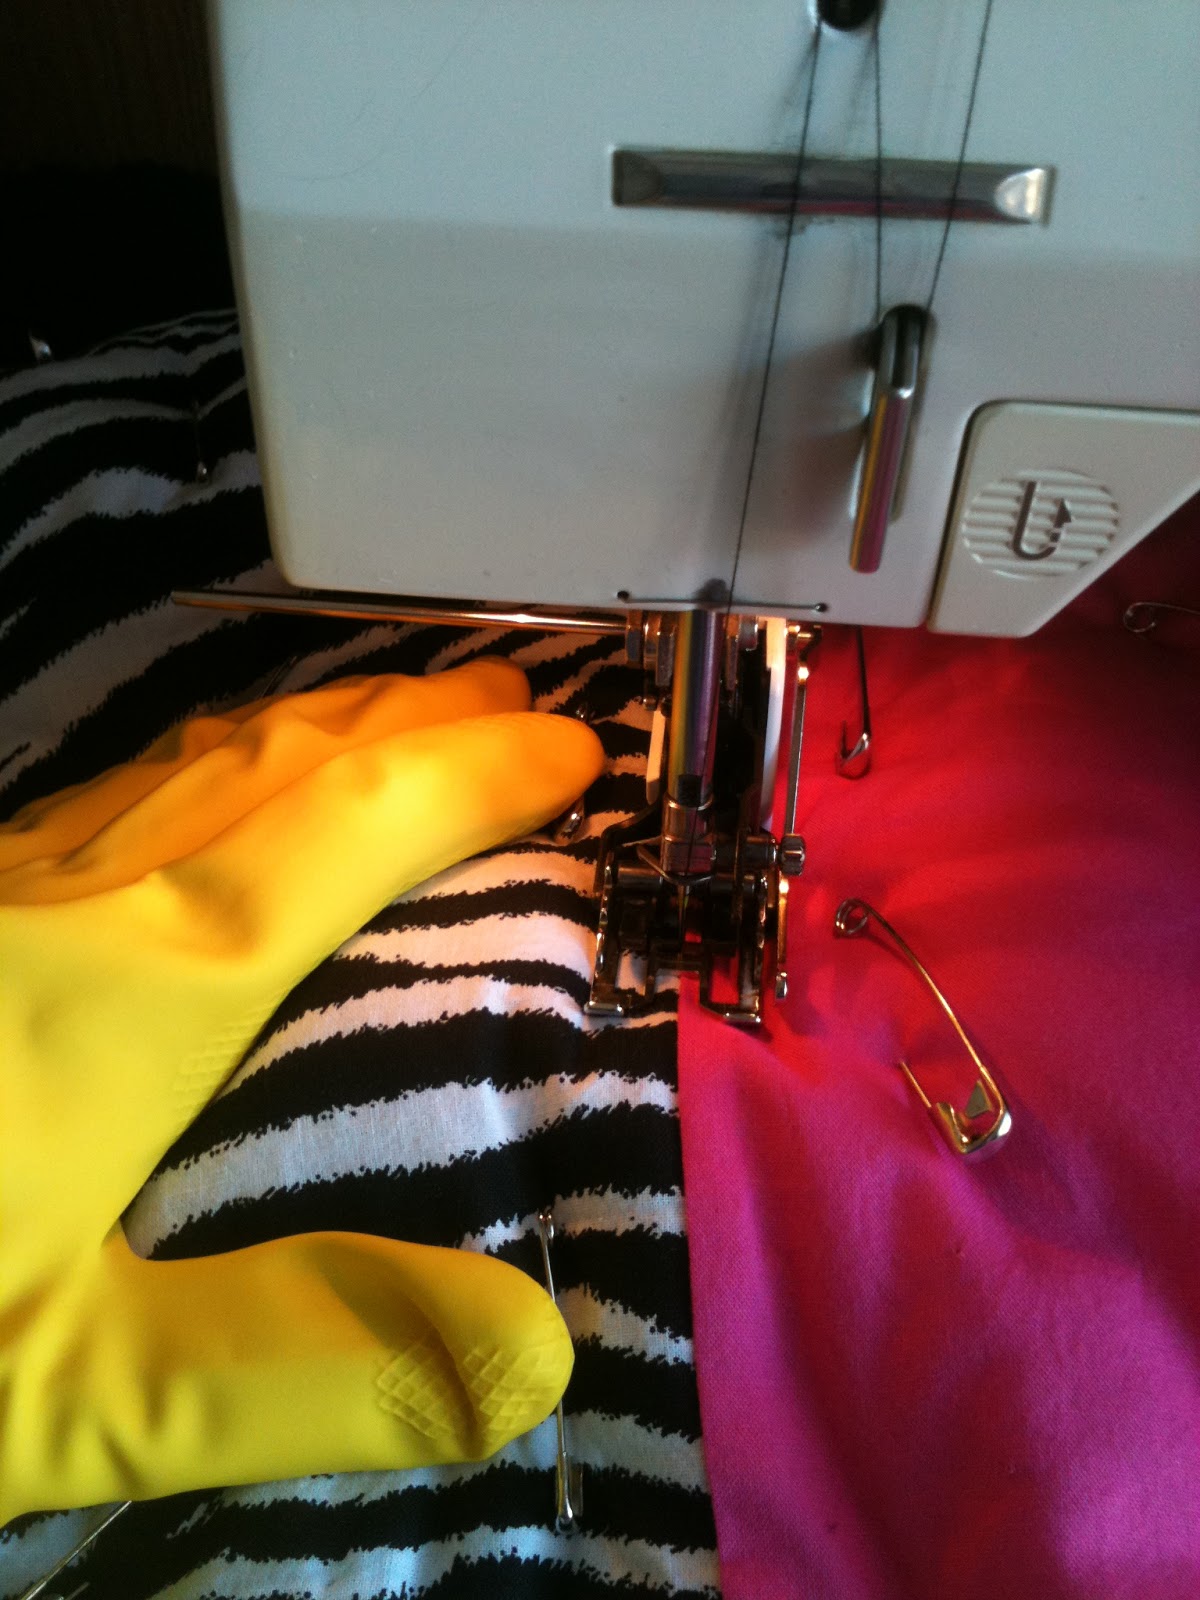
Here I am stitching in the ditch with my walking foot. The quilting blogs tell me to use gardening gloves to hold onto the fabric since they have grippy things on the fingertips. I don't garden, so I tried using rubber gloves. They kinda, sorta worked.

So here I am quilting. Woo!! Hoo!! Tomorrow, I'll post what my quilt looks like with some actual quilting done over the zebra cotton. It's awesome!!

Sunday, December 2, 2012

Baby Preparation


Just got in from my daughter's. Made a quick trip to take her a bookcase, stroller, and car seat with 2 bases for her, the son-in-law, and the pending addition to the family. I left Saturday morning and got back late this afternoon. I'm bushed!! However, the nursery looks great.


She purchased the stencil for the wall back in July. Since the closet door seemed dull, we thought that would be a great place for the tree stencil. Both of us think it turned out great.
I hope you notice the lamp on top of the bookcase. It's a tree branch with birds. Very cute and a great purchase from Hobby Lobby.


The high point of the nursery is the owl quilt made by moi. She picked out the McCall's pattern back in July, too. The quilt is supposed to be made from fleece, but that didn't seem quilt-like to me. So, I decided to make it out of cotton like a real quilt AND I handquilted it--a task I had never tackled before.


Since the quilt was designed for a baby, I wanted it to have a whimsical quality. I like the owls' faces--they are happily watching.

I learned so much from this experience. First, I stepped way out of my comfort zone. I have not only never quilted, I have never WANTED to. The idea of cutting yardage up into little pieces and then sewing them back together again did not interest me at all!! However, if you look close, you will see that the quilt is applique style:


Since I was handquilting, I could add to the whimsy flavor by adding little details. As a beginner, I kept the additions simple and was very selective to where I would make the details. Here, I added "feathers" to the wing. 


I added a heart to the girly owl's tummy.I [put veins in the leaves, too.


Then, I hand quilted the filler space between my appliques. Again, I made the rules


up as I went. Using red, sidewalk chalk, I made a meandering line that ran all over the quilt. Here, you can see my design. The chalk washed out with the first washing.

Sunday, November 18, 2012

Time has flown!!

Here I sit, on the Sunday before Thanksgiving, contemplating how quickly the year has gone. This time last year, I was filled with grandiose ideas to create, sew, knit, etc. Though I have done a lot, it is only a fraction of what I wanted to accomplish. Now that can only mean one of two things:  either I am totally unrealistic (which I would never confess to), or time just got away from me and now I am snowed under. I choose answer number two, since there is less guilt involved.

In case you haven't heard, my eldest daughter is expecting. This will be my first grandbaby. No, she doesn't know what she is having, so I can't invest any time sewing gender specific items. However, I have been a busy bee sewing for both mom and baby. I made most of her maternity wear including skirts, shirts, pants, and a coat. The Megan Nielsen patterns are fabulous!! They sew up very quickly, look better than most of the clothes in the stores, and best of all--they fit!! My daughter has been very pleased with her work attire.

Currently, I have sewn for the nursery and the baby. I began with 6 yards of flannel from Hobby Lobby. I made the crib skirt first, then followed with 2 crib sheets from the same flannel. Here in Texas (I am told) flannel crib sheets are almost impossible to find. I haven't seen any in the usual stores I shop in. Crib sheets take about an hour to make, require 2 yds of fabric, and 1.5 yds of elastic. I am very pleased with the final project.

Next, I made the son-in-law a diaper bag. My daughter purchased a beautiful, floral one from Vera Bradley, but it wasn't something I could see my son-in-law carrying, so I offered to make him a brown one per his request. I used brown canvas with a blue cotton trim. Though I like the final project, I realized a lot that I would do differently. First, adhesive interfacing does not stick well to canvas. Second, a diaper bag requires a heavy duty magnet closure or velcro. Here is my final project:


 There are double pockets on each side and 3 pockets on the front. The straps can be converted from a backpack style to a traditional bag with double handles. Inside, there are more pockets. I think I would remove those next time and just have the inside one big, roomy space.

The front zips open with zippers on each side and the top opens with a double purse zipper. I had most of the notions in my stash, but did have to purchase the purse zipper and lining fabric.
 Here is the backpack version. The sliders that adjust the straps were purchased from an online company--Strapworks. I purchased the clips at Joann's, but next time will order those from Strapworks, too. There is quite a cost difference.

I'm not really sure the son-in-law will use it, but at least he knows it was made for him. That does say something nice about the mother-in-law, doesn't it?

The pattern is McCall's 6617. At first it seemed rather daunting with the 53 steps required to make it. However, when taken one step at a time, the bag really isn't that hard. However, when I make the next one, I will do several things differently. I do plan to make it again, but for another purpose:  I think this would be a great picnic bag. We shall see after the first of the year when I have more time to play.

I have been very busy knitting, too. I made 3 baby afghans (I see now days they call them blankets). This first one is for my daughter. The color isn't real clear, so let me describe it. I used a wool blend in a variegated yarn that blended from cream to dark gray. Woven within the strands were pink and blue threads. It is gorgeous (if I do say so myself). The pattern was simple and a free download from the TLC website. I am very pleased with this one. I think my daughter really likes it, too.

 Next I knitted this red cable baby afghan. This was done in a yarn that I had purchased to make a sweater several years ago. Unfortunately, I misplaced (I refuse to admit that I lost something) the directions and couldn't finish it. I ripped the knitting out and had this huge ball of yarn that stared at me every time I opened the sewing closet door. Finally, I decided a baby afghan to put in the gift stash would rid me of the yarn. It worked up beautifully!! and was a prized gift at the baby shower last week.


Though the cable looks difficult, it really isn't. This afghan took about 7 days to complete, which isn't really

that much time when you consider I only knit in my wasted down time.


Last, I made the same afghan as the one for my daughter, but used a worsted weight baby yarn. Isn't this lovely? The picture doesn't show the color real well, but this is a very pink afghan. I love it--especially when I found the yarn on clearance for $1.90 per skein. This is the only item left in the gift stash at the moment. Which means--TA DA--I get to start all over again replenishing the stash. LOVE IT!!


Work has a silent auction that benefits our employee charity. I made this wine bag as my donation. My co-workers will add wine, glasses, and a chocolate to make it extra special. I think it turned out lovely!! I hope we make a killing on it!! That was last week's project.


And this quilt is my gift to the nursery. My daughter wanted to make this quilt, but never got around to it. Originally planned for fleece, I decided that fleece was a blanket not a quilt, so I hand sewed this owl quilt top. Last week I finished hand sewing the appliques, cut the backing from the leftover flannel from the crib skirt, and purchased the cotton batting. I am slowly teaching myself to hand quilt. Since I don't have a quilt frame, I pinned the quilt together with curved safety pins, then pinned the quilt to my ironing board to stabilize it. So far, I am about 1/2 done. A friend of mine who has quilted in the past tells me I am not doing it right. Does that really matter? The batting is sandwiched between the top and back and the hand stitches are holding the whole thing together. Isn't that quilting?


Here is an example of my quilting. Personally, I like the imperfection that occurs with hand quilting. I recognize machine quilting is a whole lot faster, but the stitches come out perfect. Mine are wobbly and irregular in length. That is fun to me!! Besides, I want my daughter to tell her son or daughter how Grandma D made the quilt before they were born. I want them to know that I learned on their special quilt. Each stitch is made with me in thought and prayer for my soon to be born grandson or granddaughter. How special is that?


God has not only gifted me with crafty talent, He granted me the courage not to live so serious. I enjoy what I do immensely. Perfection isn't nearly as important to me as enjoying the experience of stretching myself and doing something outside of my level of expertise. In my world, failure is an option--because failure is learning. I know what I create brings joy to others, and that gives me pleasure. How many other sons-in-law can boast that their mother-in-law made them a diaper bag? How many daughters have designer original nurseries made especially for them by their mothers? I am truly blessed--not only in the talent but by the family who lovingly appreciates my craftiness.

Thanks God.


Saturday, September 22, 2012

Baby's doing good

     I have continued to sew for the pregnant daughter, but as she enters her 3rd trimester, I begin to sew for the baby, too. Here's my first creation:  the baby bunting. I found this fleece at Hancock's for $6 last week and thought it would be perfect for a newborn. The hood is lined with heavy, tan fleece. I debated about lining the whole thing, but since it was the first time I used the pattern, I opted to start slowly with a single layer. You can't see, but the sleeves end with fold over plackets that create mittens. I found an orange zipper in my stash that matched perfectly. Final cost:  $7. I wanted owls, but didn't find anything that could serve boys or girls well. Will keep watching.

     So, today I have an animal print maternity top to finish (the Megan Nielsen ruched top). I mailed out a care package Tuesday for the daughter and wait for feedback on the wool skirt. I have another piece of wool plaid and a navy pinstripe that I'd like to turn into pants for her. I want to make sure the hipline is correct BEFORE cutting the material, though.

     I should be sewing for me, but I cannot seem to jump start myself. I have plenty of patterns, fabric, and time, but when it comes to stopping, choosing, fitting, cutting, and sewing for myself, I'm a bit of a dud. I joined this online community and agreed to sew my own clothes for a year--that began Sept 1. So far, I have made a black t-shirt with black, knit pants and a fleece jacket. What I really need is undies since my undie drawer is nearly empty. Do I sew panties that take next to no time or fabric? Of course not. I'm looking at slacks, tops, jackets, even camisoles and cardigans (and I never wear those things). My social outings are usually limited to work, work, work, and the grocery store. Not exactly a couture world that I run in. OK, here's the promise:  Today I will cut out at least ONE thing for myself and complete it before September runs out. OK--help me stay honest and on track.